Documentation
Getting started with Archivium
Everything you need to start cataloguing your collections and get the most out of Archivium.
What is Archivium?
Archivium is a home for any collection — books, watches, fountain pens, vinyl records, stamps, coins, and more — with a type built for each one, and beautiful themes to match.
The key idea is that Archivium adapts to whatever you collect. A collection type defines which details matter — for books that might be author and ISBN, for watches it might be case size and reference number. This means Archivium works just as well for a library of 5,000 books as it does for a carefully curated set of 12 watches.
Creating an account
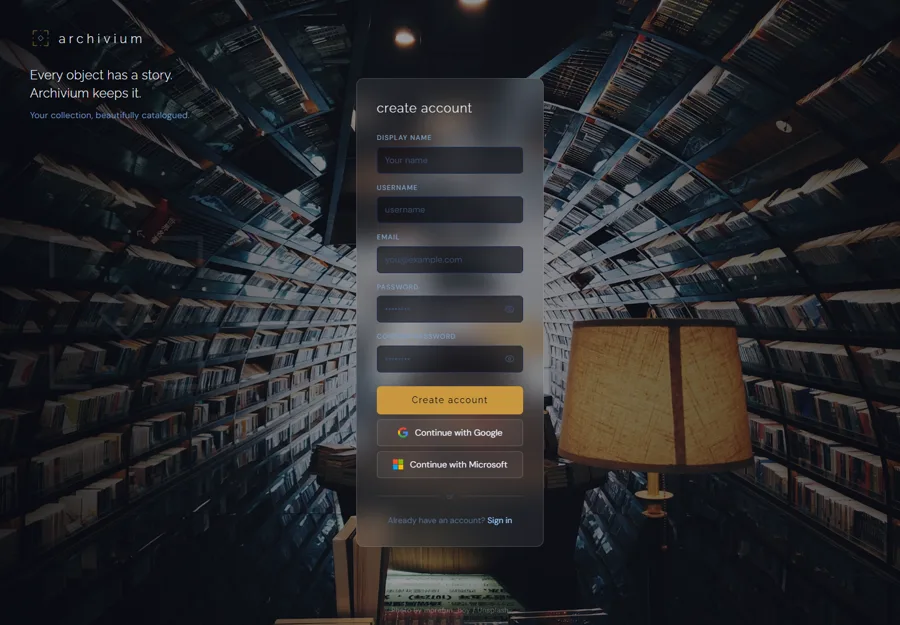
- Go to my.archivium.art/register.
- Enter your name, email address, username, and a strong password.
- Check your inbox for a confirmation email and click the verification link.
- You'll be taken directly to your dashboard on first login.
Your first collection
From the dashboard, click New Collection (or press N).
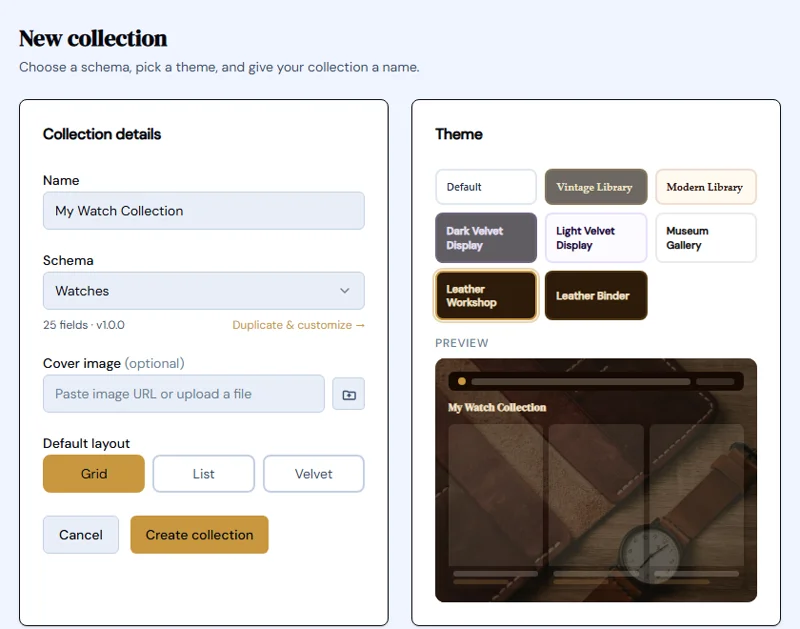
- Choose a collection type — pick a ready-made type that matches what you collect, or browse the marketplace for more types from the community.
- Name your collection — e.g. "My Books", "Watch Collection 2024".
- Choose a theme — each collection type has a suggested default theme, or pick any available theme.
- Click Create. Your collection appears on the dashboard as a tile.
You can change the theme and cover image at any time from the collection settings.
Adding items
Open a collection and click Add Item (or press N while inside a collection).
The form is organised into a few natural groups: the essentials at the top, then key specifics, how you acquired it, and tags. Fill in as many or as few fields as you need — nothing is mandatory.
Adding a Books, Comics, or Vinyl Records item? A lookup panel appears next to the ISBN, Barcode, or Catalogue number field so you can auto-fill the rest instead of typing it all by hand — see Metadata lookups & API keys below for what each one does and how to enable it. For Vinyl, the lookup also fills in the full track listing; add, reorder, or edit tracks by hand any time in the item's Track List section, with a dedicated Tracks tab showing the finished list.
Save with Save item. The new item appears immediately in the browse view.
Collection types explained
A collection type is the blueprint for a kind of collection. It defines:
- Fields — the specific details you track, like title, author, condition, or photos.
- How it's displayed — Archivium automatically knows which field is the title, which photo to feature, and which details to highlight, so every theme looks right no matter what you collect.
- Room to grow — collection types can evolve over time, and your existing items update safely whenever they do.
Archivium comes with ready-made types for Books, Comics, Vinyl Records, Watches, Fountain Pens, Stamps, Coins, and Banknotes. The marketplace will add even more over time.
Creating your own type
Collect something the ready-made types don't cover? Open My Schemas from your account menu to build your own — available from the Curator plan up.
- Customize a built-in type — start from the closest existing type (e.g. Books) and adjust its fields. Unlimited on Curator and Archivist.
- Start from scratch — build a completely new type field by field. One on Curator; unlimited on Archivist.
- Add, rename, or remove fields any time. Existing items update automatically — nothing is ever lost.
- Delete a type you own from the same My Schemas screen (built-in types can't be deleted, only customized).
Themes and layouts
Every collection has a theme — a complete visual makeover covering colours, typography, background imagery, and card style. Themes are assigned per collection, not per account, so your book collection and your watch collection can look entirely different. Even the header quietly adapts to match whichever collection you're browsing.
Archivium ships with 7 built-in themes: Vintage Library, Modern Library, Dark Velvet Display, Light Velvet Display, Museum Gallery, Leather Workshop, and Leather Binder — more are coming with the marketplace. Each theme also has its own card style (Glass, Elevated, or Outlined).
Within a theme, you can choose a browse layout — Bookshelf, Crate, Velvet, Tray, Album, Sleeve, or the classic Grid and List — 8 in total, each suited to a different kind of collection (Bookshelf for books and vinyl, Velvet for watches and pens, and so on).
Change the theme and layout from the collection's settings panel (gear icon in the collection header).
Rooms
Archivium already works like a museum: your Dashboard is the museum, and each collection is a gallery inside it. Rooms add the third level — organise a large collection into museum-style rooms, the way a real gallery is split into rooms by era, geography, or theme.
When creating a new collection, choose Flat collection (items directly, as today) or Collection of Rooms — a one-time choice made at creation. Every Room in a collection shares its parent's collection type and theme, set once at the top, so browsing a Room looks and behaves exactly like browsing any other collection: same sort, filter, themed layouts, and bulk operations. Each Room has its own name, description, and cover photo, shown as a full-width header the moment you open it.
- Rooms view — the collection opens to a grid of Rooms, each showing its cover photo and item count, just like the Dashboard shows collections.
- Items view — switch to a single flattened list of every item across every Room, with full search, sort, filter, and export — exactly like browsing a normal collection. Adding an item here asks which Room it belongs to first.
Exporting a collection of Rooms as a spreadsheet (CSV/JSON/XML) adds a Room column to every row. Exporting as a PDF list or catalogue goes further — each Room becomes its own chapter, with a heading and its description, genuinely reading like a printed museum catalogue rather than a flat list. Backing up and restoring preserves the whole Room structure, and re-importing a file you'd previously exported from Archivium routes each item back to its original Room automatically.
Collection Plan
Alongside the facts you catalogue item by item, every collection (and, inside a collection of Rooms, every Room) can hold a Plan — a written document for the reasoning behind it: why it exists, how it's organised, what to look for next. Open it from the Plan tab next to Overview and Browse.
- Write in Markdown, with a toolbar for headings, bold, italic, lists, quotes, links, and a horizontal rule — a live preview sits alongside the editor as you type.
- Every save keeps the version it replaced. Open History to see the last 20 versions and restore any of them with one click — restoring is itself just another save, so it's never a dead end.
- For a collection of Rooms, the Plan tab reads as one continuous document — the collection's own plan, followed by every Room's own section in order, each one a direct link to that Room's own Plan page — so you see the whole picture without visiting each Room separately. A Room's own section is still edited from that Room's own Plan tab, which links straight back to the collection's.
- Mention an item anywhere in a plan by typing
[[item:followed by its ID, copyable from the item's own page URL — it renders as a live chip showing that item's current title and status, linking straight to it. The item's own page gets a reciprocal Mentioned in the plan link back. If the item is later deleted, the chip degrades to a plain "deleted item" note instead of breaking. - Click Print for a clean, chrome-free version — no header, sidebar, or buttons — ready to save as a PDF from your browser's print dialog.
- Click Export to download the plan as a plain Markdown file — handy for working on it elsewhere, including pasting it into an AI chat session for help thinking it through. Click Import to bring a file back in: it opens in the editor for you to review and adjust before saving, never overwriting your plan automatically. For a collection of Rooms, Export bundles the same aggregated document Print produces into one file, and importing it back splits each Room's own section back to that Room automatically.
Plans travel with your data: JSON and XML exports carry the collection's plan (and, for a collection of Rooms, every Room's own plan too), and re-importing a file you'd previously exported from Archivium restores all of it — the collection's own plan and every Room's. CSV leaves plans out — there's no sensible column for a document-length field.
Search, sort & filter
Search
The search bar in the header becomes context-aware inside a collection — it searches across all text fields of items in that collection. Results update as you type (300 ms debounce). Press / to focus it from anywhere.
Sort
Use the Sort control in the collection browse header to sort by any field in your collection, or by Date Added / Last Updated. Click the direction toggle to reverse the order.
Sorting by title, "The Road" can sort under T or under R — go to Settings → Preferences → Title sorting format to choose whether a leading article counts. This checks articles in all 5 supported languages (English, French, German, Italian, Spanish), regardless of which language your app is currently displayed in, and applies to the browse view and PDF list/catalogue exports alike. It only ever changes sort order — titles always display in full, everywhere.
Filter
Click the Filter button to open filter options. You can filter by:
- Text fields: contains
- Select fields: is one of
- Numeric/Year fields: range (min/max)
- Rating fields: minimum rating
- Boolean fields: is / is not
- Date fields: before / after / between
Active filters appear as chips below the header bar. Click the × on any chip to remove that filter.
Bulk operations
Hover over any item card to reveal a checkbox. Click it to enter multi-select mode. All items will show checkboxes.
- Use Select all in the header to select every item currently visible.
- Use Archive selected to soft-delete items (they move to the archive view).
- Use Delete selected to permanently delete items (with a confirmation dialog).
- Press Escape or click Cancel to exit multi-select mode.
Toolbox
Values drift over time — "J. Tolkien" in one item, "J.R.R. Tolkien" in another. The Toolbox finds and merges inconsistent values across all your collections at once, instead of fixing them item by item.
- Click the Toolbox icon in the header (or find it in the menu on mobile).
- Your collections are grouped by collection type — a fix to a shared type applies everywhere it's used, not just the one collection where you spotted it.
- Switch between the Text fields, Tags, and People tabs to see the variants Archivium found in each.
- Choose the correct value for each group and confirm the merge.
Every item using a merged variant is updated in one step.
Bulk operations by file
Moving, copying, or deleting a handful of items works fine from a browse grid's checkboxes — but not at the scale of hundreds or thousands. The Toolbox's Bulk operations tab does it from a JSON file of item IDs instead.
- Upload a file naming the operation (
move,copy, ordelete), a destination collection or Room for move/copy, and the list of item IDs. Name the destination, or target it by ID instead — needed when two Rooms in different collections share a name, or when the destination Room is empty and has no items to name it from. A JSON or XML export of a collection of Rooms lists every Room's ID, including empty ones; CSV doesn't carry it. - One file can list several operations, each with its own destination — useful for splitting one big list across several Rooms at once. If one operation's destination is wrong, the rest still run; only that one is reported as failed.
- Review the preview (how many items, going where) before confirming. Deleting requires an extra checkbox to confirm it's permanent.
- A progress bar tracks larger uploads, with a summary of what succeeded, what failed, and any IDs that weren't found.
Photo galleries
Each item can have up to 4 photos. One photo is designated as the hero — it appears on the collection browse card, the item view header, and all themed layouts.
- In the item edit form, click the photo field to open the photo editor.
- Paste a URL or upload an image file.
- Use the crop dialog to choose an aspect ratio or draw a custom free-form crop.
- Add a caption (optional).
- The first photo is automatically the hero. Click the star icon on any photo to designate a different hero.
In the item view, the gallery strip below the main image shows additional photos. Click any to promote it to the main view (client-side only; the hero designation is unchanged).
Document vault
The Documents tab in an item view lets you store important documents alongside the item — receipts, certificates of authenticity, insurance appraisals, warranty cards, service records, provenance documents.
- Open an item and click the Documents tab.
- Click Upload document.
- Select a PDF or image file (max 20 MB).
- Choose a document type, add a title, date, and notes.
- Click Upload.
Documents are stored securely and are never publicly accessible. Use the preview button to view a PDF or image inline without downloading.
Metadata lookups & API keys
For Books, Comics, and Vinyl Records, Archivium can look up an item automatically instead of typing everything by hand — paste an identifier (or scan the barcode with your camera, on supported browsers) next to the right field and it fills in the details. Watches, Fountain Pens, Stamps, Coins, and Banknotes have no such identifier to look up, so Archivium can read a photo instead — see AI photo identify below.
- Books — enter an ISBN next to the ISBN field. No ISBN on hand (or it doesn't match)? Click "No ISBN? Search by title & author instead" underneath to search by those instead and pick from the matching results.
- Comics — enter a barcode, or search by series and issue number, next to the Barcode field.
- Vinyl Records — search by catalogue number, barcode, or artist and title next to the Catalogue number field, including the full track listing.
- Watches, Fountain Pens, Stamps, Coins & Banknotes — take or upload a photo next to the cover photo field and Claude (Anthropic's AI) reads what it can from the image. Also works for Books and Comics as a fallback, while their ISBN/Barcode field is still empty.
Each lookup pulls from one or more external providers. Some work with no setup at all; others need a personal API key or access token, usually a couple of minutes to get. Add yours under Settings → Integrations — every user supplies their own key, so your quota (and, for AI photo identify, your own usage cost — see below) is never shared with anyone else's.
Books (ISBN)
Several sources are tried in order until one finds a match — drag to reorder them in Settings → Integrations.
- Archivium — shared metadata from other Archivium users. No key needed, no limits.
- Open Library — open community catalogue, strong for English titles. No key needed.
- Google Books — broad international coverage. Works without a key at a shared rate limit; add your own free key for 1,000 lookups/day — enable the Books API in Google Cloud Console and create an API key.
- ISBNdb — excellent international coverage. Requires your own key — register at isbndb.com and copy your REST API key.
No ISBN to hand, or it doesn't match anything? Switch to title & author search instead — it queries the same sources and returns several candidates to pick from, since a title alone can match more than one book or edition.
Comics (Comic Vine)
Comic Vine needs a personal API key before lookups will work at all — it's free. Register at comicvine.gamespot.com/api to get one; it's rate-limited to 200 requests/hour.
Vinyl Records (Discogs)
Works without a key at a lower rate limit. For a higher limit, add a personal access token from discogs.com/settings/developers — use the "Generate new token" button, not "Create an Application" (that one's for building a public app and needs review first).
Watches, Pens, Stamps, Coins & Banknotes (AI photo identify)
These five types have no barcode or catalogue number to look up, so Archivium can read a photo instead. Take or upload one next to the cover photo field, and Claude reads back whatever it can confidently identify — brand and model, materials, denomination, country of issue, and more, depending on the type — into a preview you review before applying. The photo itself becomes the item's cover image.
Also appears for Books and Comics, but only as a fallback while the ISBN or Barcode field is still empty — enter one and the precise lookup above takes over instead. It's never asked to guess the ISBN or issue number itself, only the surrounding details.
This one requires a personal API key from an AI provider — currently Anthropic, with support for other providers planned. Add yours under Settings → Integrations (get one at console.anthropic.com); each identification is then billed to your own account at the provider's own rates — unlike the free lookups above, there's no included quota.
Barcode scanning
On a phone, tablet, or laptop with a camera — in a browser that supports it (Chrome and Edge; not currently Safari or Firefox) — Archivium can scan barcodes directly, no separate app needed.
Quick scan from search
Click the scan icon in the search bar at the top of any collection page and point your camera at a barcode or ISBN. Archivium checks it three ways:
- Already in your collection — the grid filters straight to it, same as a text search.
- Not in your collection, but found externally (via the metadata lookups above) — a prompt shows what it found, with a + Add this item shortcut straight into a pre-filled Add form.
- Not found anywhere — a + Add manually shortcut opens a blank Add form with the code already in the right field.
Works for Books, Comics, and Vinyl Records — the three types with a barcode-based lookup.
Scan Queue — scan now, review later
Built for rapid-fire sessions — a library sale, an estate clear-out — where stopping to fill in every detail as you go slows you down. Open Scan Queue from your account menu (or the mobile menu), click Start scanning, and keep scanning one barcode after another — each capture gets a confirmation beep and lands as its own row in your queue.
Come back and review whenever suits you, even from a different device — the queue is saved to your account, not just one browser. For each row, choose a collection and click Check to run the same three-way lookup as above, then either + Add this item (marks the row Checked rather than removing it, so nothing is lost if you don't finish saving) or Discard to drop it for good.
Marketplace links
A row of one-click search buttons at the bottom of an item view, pre-filled with that item's title and details — useful for checking current value or finding another copy. An eBay link is added for you automatically the first time you view an item, and works for any collection type.
Go to Settings → Integrations to add more: AbeBooks (Books), Chrono24 (Watches), and Discogs (Vinyl) are ready-made presets, or build a custom link to any site using your collection type's own fields.
Importing data
Go to a collection's settings (gear icon) and choose Import. Archivium supports:
- App exports — Books and Comics exports from other cataloguing apps, including back covers and extended details
- Spreadsheet (CSV) — a simple field-matching screen lets you map your columns; works for any collection type
- Archivium backup — bring in a full export from another Archivium account
- FileMaker (Fountain Pens) — a specialist import for Fountain Pens collections migrating from a FileMaker database
Exporting data
Go to a collection's settings and choose Export. Available formats:
- Spreadsheet (CSV, JSON, or XML) — every item in your collection, with all of its details
- Images ZIP — all featured and gallery photos in a zip archive
- PDF List — compact table with optional thumbnail, title, identifier, key specs; A4 portrait
- PDF Catalogue — full-page layout per item with large cover image and complete metadata; A4 landscape
All export formats are filter-aware — they export exactly the items visible in your current browse view (search, sort, status, and custom filters all applied).
Backup & restore
Go to Settings → Backup.
Manual backup
Click Download backup to download a ZIP containing all your collections, items, preferences, and vault documents. Check Include item photos to bundle your uploaded photos into the ZIP as well.
Cloud backup
Click Back up now to upload a backup to secure cloud storage. You can list, restore from, and delete cloud backups at any time.
Automatic backup
Enable automatic backups with your preferred frequency (Daily / Weekly / Monthly) and set the maximum number of versions to retain. Older backups are pruned automatically.
Restore
Upload a backup ZIP or select a cloud backup and click Restore. Data in the backup is upserted — existing data not in the backup is never deleted.
Account settings
Go to Settings → Account to update:
- Full name — displayed in the UI and on PDF exports
- Username — must be 3–50 characters; letters, numbers, hyphens, underscores, and dots only
- Email address — a verification link is sent to the new address before the change takes effect; the old address receives a security notice
Language
Archivium speaks English, French, German, Italian, and Spanish, with more of the app being translated all the time.
Go to Settings → Preferences and choose your language from the dropdown — each one is listed by its native name (Français, Deutsch, Italiano, Español) so you can find yours regardless of what language the screen is currently in. Click Save preferences to apply it. Your choice is saved to your account, so it follows you to any device you sign in on.
Security
Go to Settings → Security to change your password.
Archivium requires a strong password with all of the following:
- At least 8 characters
- One uppercase letter (A–Z)
- One lowercase letter (a–z)
- One number (0–9)
- One special character (e.g. ! @ # $)
The password strength meter on the registration and password change screens shows your progress in real time.
If you signed up with Google or Microsoft, you can link or unlink those accounts from Settings → Security. Note that changing your email address will unlink any associated OAuth accounts.